Magic wand is a powerful tool for selecting automatically complicated but similar structures. Similar means in this case either similar colors or similar z values (heights). Once a structure is selected, the entire collection of image analysis features are at your disposal. For example, the function "Transform selection into object" converts the current selection into an object and enables you to use the extensive object property selection for further analysis.
Read on for a detailed description:
The magic wand selection process begins with a click on a previously selected image. From this starting point, any pixel is selected which
In this way, similar and contiguous pixels are selected and form the selection result.
The magic wand tool processes two kinds of layers:
In the first case, colors within a user defined range are selected where in the latter case, heights respectively z values are selected.
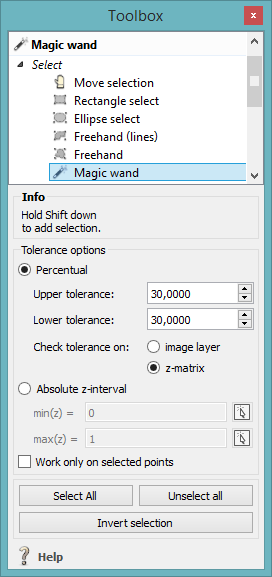
Two range defining options are available: percentual or absolute. The percentual defined tolerance option processes both image and z layer. Thereby, contiguous pixels within the upper and lower range of the start pixel will be allocated to the current selection. The absolute z value option processes z values only. Thereby, only contiguous pixels within the specified z value range will be allocated to the current selection. For an easy definition of the z value range, you might use the buttons on the right to define the z value upper and lower limits by clicking inside an selected image on an upper and lower image part. The so selected limits are automatically inserted into the magic wand settings dialog.
Let's see how the specified range influences the selection result:
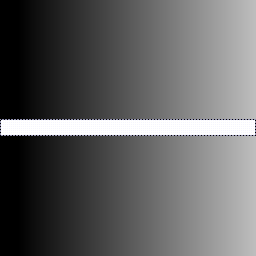
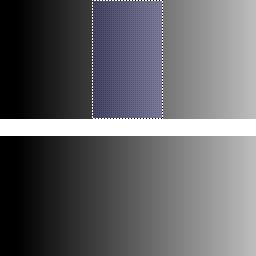
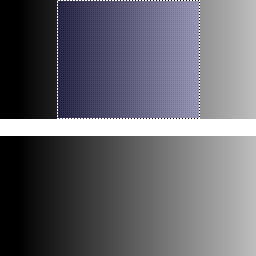
In the first image, we start the magic wand process by clicking into a region of similar colors and z values - the white middle part of the image. The specified magic wand settings allow a tolerance of 10 percent. Hence, this results in a selection of the entire bright and prominent part in the middle of the image. As a next step, we start the magic wand tool from a gray scale region in the upper part of the second image. Around this starting point, every pixel is allocated to a selection which is connected to a previously selected pixel and exhibits a color respectively a z value within 20 percent of the start pixel value. If we increase the tolerance by a factor of 2, we get a selection in the third image which contains twice the size of the former selected gray scale region.
The results of consecutive magic wand processes may be combined by holding the shift key. Every pixel of the last magic wand execution will be added to the former selection.
The selection process of the magic wand feature might be restricted to a previously selected region by choosing the "Work only on selected points" option.
Complicated structures surrounded by simple and similar ones might be easily selected by executing the magic wand function in reverse order. Start the magic wand selection on a structure with similar colors and heights, add additional points to the selection if needed (see "Adding points to current selection") and press the "Invert selection" button in the dialog window.