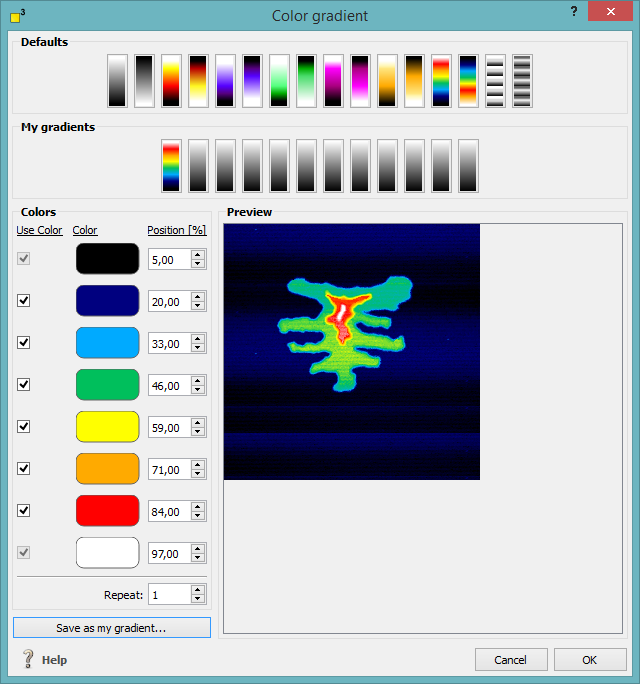
 The color gradient translates the numerical statement of the z matrix into a visual presentation and vice versa. Dependent on the current color gradient method, features may appear more or less emphasized.
Read on for further details:
The color gradient transforms heights in colors. Thereby, the extreme values (minimum and maximum z values) are determined. The color gradient function assigns each height range of an image to a color range and expresses the exact height by varying the hue value of the current color.
When loading native image files like *.bmp and similar, the color gradient has to determine heights from the color distribution no matter if the image is a monochrome or colored one. Therefore, independent from the color, the hue value is converted into z values which define the image heights.
The right-click menu in the main window contains the mapping options in both directions under the caption "z matrix": map picture data to z values as well as map z values to picture (see the collections / right-click menu chapter).
The uppermost section of the color gradient dialog displays a collection of color gradient presets. They are applied to an image by clicking on one of them.
The color panel on the left of the color gradient dialog contains the setting options of the current selected color gradient. Each color can be employed or deployed by activating or deactivating each color checkbox. By clicking of a distinct color you might modify each one. The position values state which height level of the total image height is painted with the current color. The repeat option at the bottom of the color gradient dialog defines how often the current color gradient is looped within the overall height of the image.
After a default color gradient is modified or a new color gradient is defined, the current settings can be stored. Just click on the "Save as my gradient..." button at the bottom of the dialog and choose a gradient representation in the "My gradients" sections.
