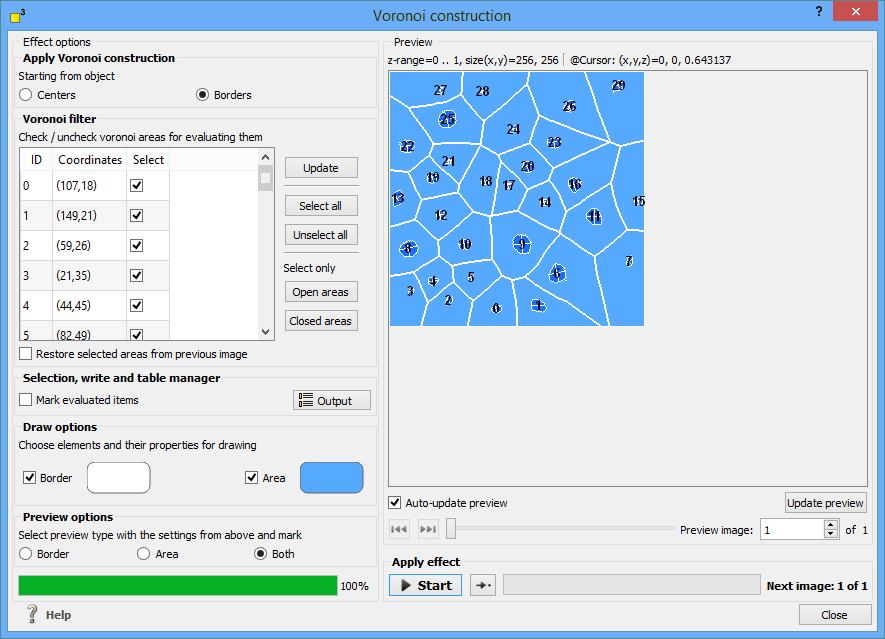
The voronoi construction offers great insights into the interaction of objects. It defines regions which are closest to the center object and sheds light on the influence of object shapes, distances and their interactive behavior. The voronoi construction dialog offers extensive options and analysis functions.
Read on for detailed explanation about:

The voronoi construction marks the data points which are closest to the an object. Therefore, you might start the calculation from the object center or from object borders. Select the applicable option in the "Apply Voronoi construction" group box.
The voronoi filter displays all regions with their ID, the center coordinates and their selection status. You might select/unselect each region manually or use the buttons on the right.
Thereby, "Open areas" means voronoi regions whose borders are not connected to the image borders. In contrary, "Closed areas" will select only areas which are fully encircled by other voronoi regions.
For transferring the selection status from the previous image, select the "Restore selected areas from previous image" option.
Selection, write and table manager
To select the evaluated regions, choose the "Mark evaluated items" options. For writing and table options, click in the "Output" button. For further explanation see the output values section.
Despite the write to header options, the output values dialog provides the same functionality as the output dialog in the object recognition. You might modify the tables output and/or select your favorite computed results. For further details see the output selection dialog in the object recognition function.
The draw options control the visualization of the voronoi areas and borders. Select which elements you want to be drawn in the origin image and modify the colors by clicking on the color buttons.
The colors will be applied to both: the preview image and the origin image.
The preview settings control the visual output in the preview image. Select if you want the voronoi areas, borders or both to be drawn. The color settings can be changed in the draw options section.
The execution of the function may be started by pressing two different shortcut keys:
For more shortcut keys see our detailed list.