For gaining outstanding scientific results it is obligatory to shift the borders of feasible measurements to extreme conditions. Despite great results the outcome often contains side effects like image drift potentially caused by an unstable temperature or unstable objects. That is the point where dotCube cuts in helping you to process your data leading to impressive stable image sequences or movies. Two kinds of drift corrections are available: The general "Drift correction" in the image processing menu bar and the "Align by object" tool in the scientific tool bar. Do not forget to emphasis interesting features by using the drawing features before you cut your image sequence and build a movie file to impress your colleagues.
Read on for getting to know in detail about:

For correcting drift in selected images, you first have to select a prominent part in the first image. This region has to occur in all images you want to apply the drift correction to. The drift will be corrected in respect to the best fit of the selected reference region. The best choice are unique image features with sudden changes in z direction.
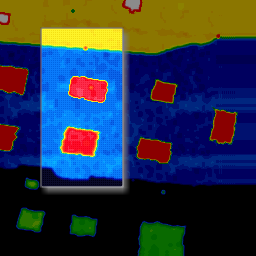
After defining a reference region, select the images which should be drift corrected. Therefore, change to "Default cursor", press the shift key and click onto any favored image.
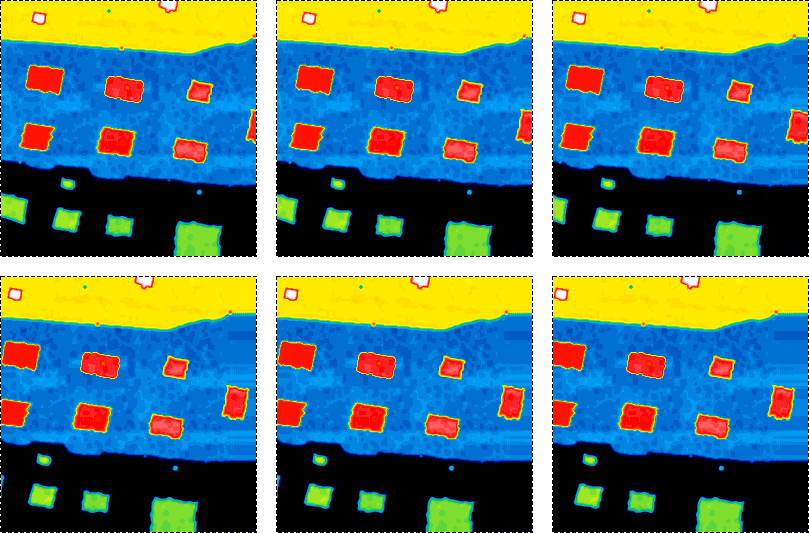
Estimate the maximum drift components in x and y direction. Larger drift limits will increase the time consumption of the drift correction algorithm. Hence, select applicable values.
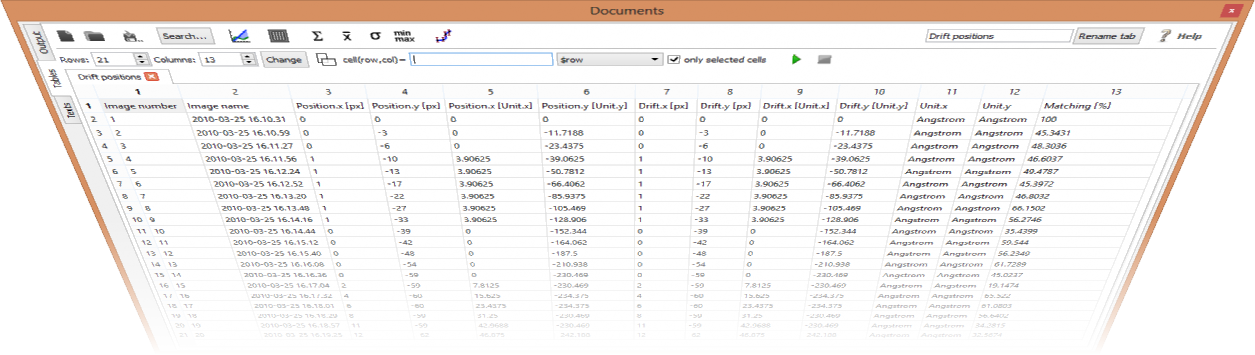
A low contrast as well as a high noise level may infect seldomly the identification rate of the reference region in an image. An improper matching of reference regions may result in a false drift correction. Therefore, dotCube provides an option to pause the effect below a certain matching value. This enables you to abort the process and adjust the drift settings or correct your sequence in a different way.
Two output options are available:
The execution of the function may be started by pressing two different shortcut keys:
For more shortcut keys see our detailed list.